Part 2 - Basic features
Other basic features
The previous chapter covered the basics of symbolic execution as well as the main components that angr uses to perform symbolic execution in a program.
If you managed to complete the challenge given as an exercise, you should have understood the main principles of symbolic execution. However, we have only seen angr’s elementary components.
The goal of this chapter is not to become an angr pro, but to learn the main features you may encounter or use in a program.
IPython
Before going further into angr’s features, I wanted to share this extremely useful module with you when using angr or, more generally, when coding in Python.
I actually discovered this Python module while learning to use angr and since then, I have used it almost systematically in my Python programs. I would even say it is the first module I import when I start writing Python code.
But what is IPython for?
IPython is a module that lets you, among other things, access an interactive shell while the Python script is running. It also provides an “improved” Python shell, in the same way that zsh adds more usability to bash.
Command-line use
Simply run ipython (or ipython3) in a terminal to access it. From there, you can execute Python code. Handy when you no longer remember whether tab[3:10] includes the third value or not, without going through the internet or opening an IDE.
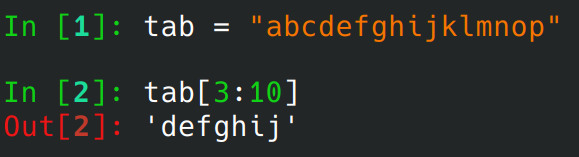
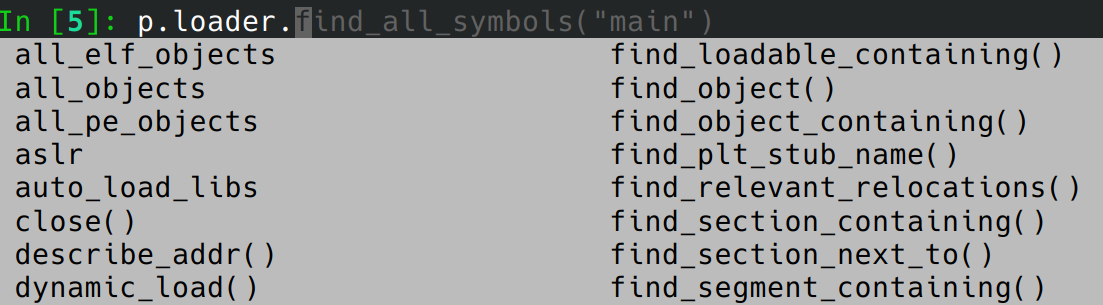
I would say that the most interesting features of IPython compared to the classic Python shell are being able to display the members and attributes of an object simply with TAB and being able to have a history of entered commands in a “zsh-style”.
This is very practical when you are too lazy to read the docs and what you are looking for has a very explicit name:
Use in a script
To use IPython directly inside a Python script, you just need to:
- import the module with
import IPython - open an interactive shell with
IPython.embed()
Let’s take the final script from the previous chapter. We are going to modify it to use IPython.
First, import the module, then add the following line to the script from the previous chapter:
1
2
3
4
5
6
7
8
else :
	print("[+] Determining the valid input")
	# Add the following line:
	IPython.embed()
	# Retrieve the state that reached the correct block
	found = sm.found[0]
	res = found.solver.eval(arg_symb)
	print("[+] A correct input is: ",hex(res))
Run the script and you will see that an IPython shell has opened. It is possible to execute Python commands there, see the value of certain variables, modify or create new variables:
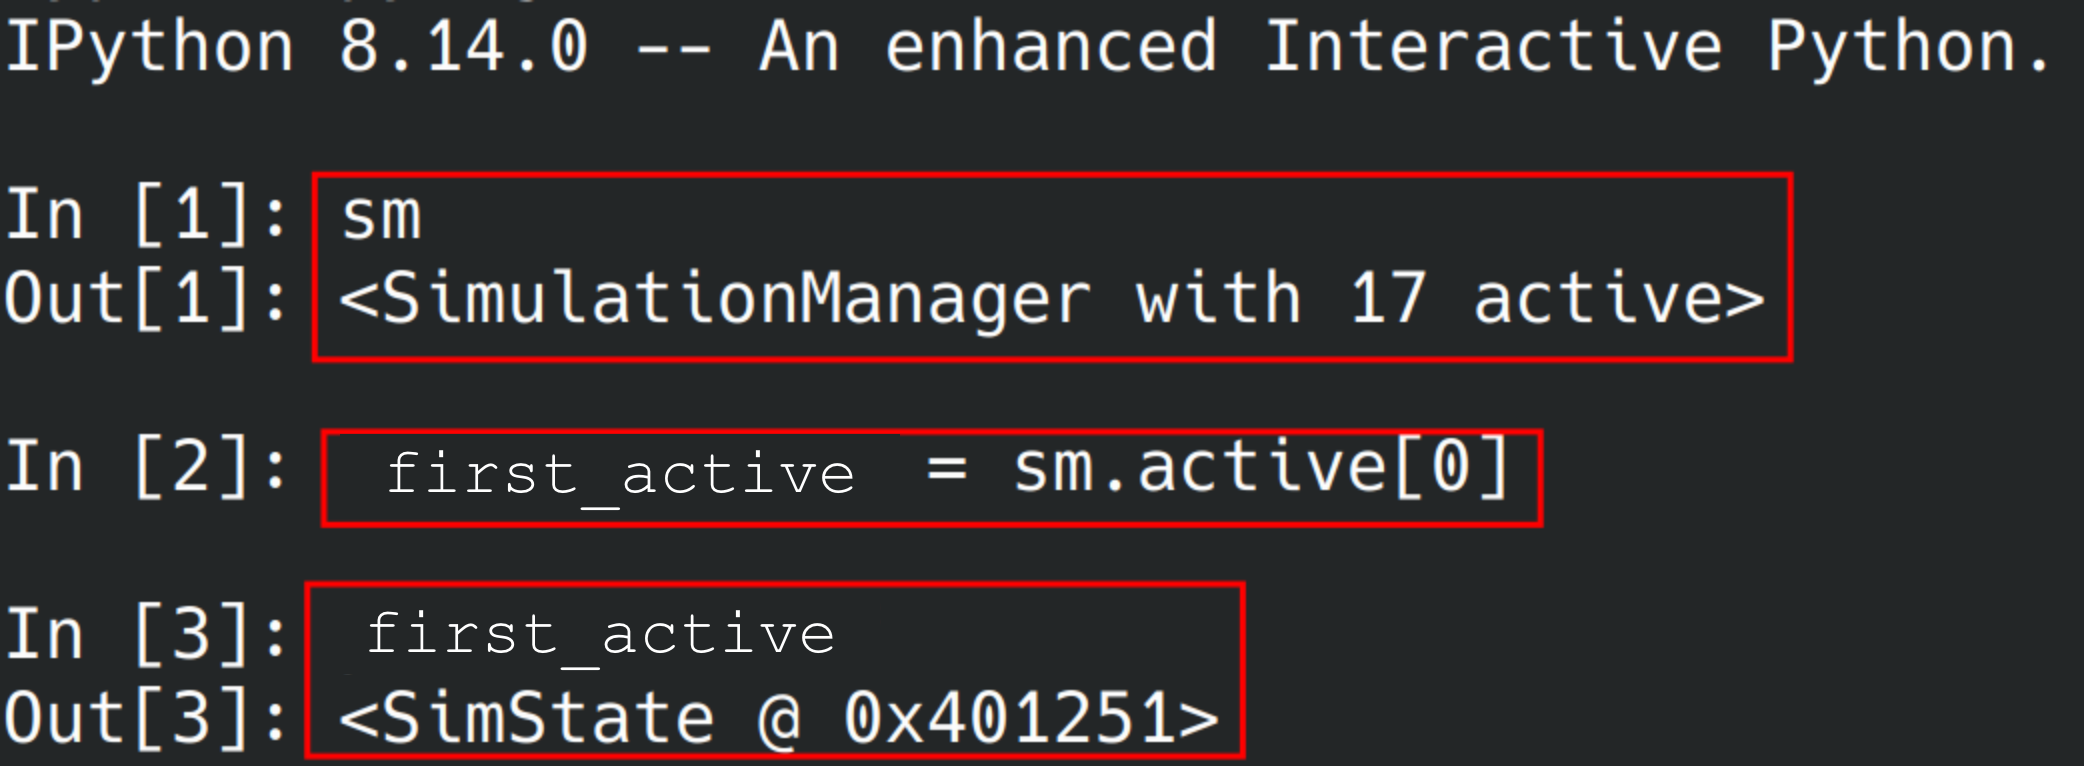
It is so convenient for taking a look at the different states, seeing the value of certain registers, and so on, without having to insert print statements and for loops everywhere.
The million-dollar question
A question everyone asks when using angr: How do I see where my angr script is stuck?
In fact, this is a recurring problem because, due to bad configuration, path explosion, or something else, an angr script may end up going in circles and consuming excessive memory without finishing.
We would really like to see and understand why the program is not working correctly. But with lots of print statements, we do not always get the details we are looking for.
The solution, as you can probably guess … being able to open an IPython terminal arbitrarily!
This is indeed possible, you just need to add this piece of code, for example after the list of imports:
1
2
3
4
5
6
7
8
9
10
11
12
13
14
15
16
import angr
import IPython
import os
import signal


def kill():
	current_pid = os.getpid()
	os.kill(current_pid, signal.SIGTERM)

def sigint_handler(signum, frame):
	print('To kill the process, enter: kill()')
	IPython.embed()


signal.signal(signal.SIGINT, sigint_handler)
By putting this piece of code at the beginning of your script, when you run your script and press Ctrl+C, an IPython terminal will open.
And as we saw a little earlier, this lets you see the list of active and finished states, analyze them, know at which address in the program the state is located, and so on.
Since Ctrl+C is usually used to kill a process and we are intercepting that signal, this shortcut will no longer kill the process. That is why you will need to enter kill() in IPython to terminate the Python program.
Use it as much as you want 😇!
Reading and writing memory 📝
If you remember the previous chapter, you should recall how we were able to access registers. For example, to access the rax register, we can use state.regs.rax.
Similarly, it is possible to access any other register, whether 32-bit or 64-bit, ARM, x86, or MIPS.
We have not yet seen how to access memory areas for reading and writing. After all, angr simulates execution, so there should be a way to access memory, right?
Here is how it is done:
- 📄 Reading memory:
state.memory.load(address, size)where:addressis an integer representing the address from which angr will readsizeis an integer representing the size of the data in bytes that we want to read- Return: the function returns a BitVector, symbolic or not (for example, if the memory area contains the 4 bytes
0xdeadbeef, the returned result will be:<BV32 0xdeadbeef>)
- ✏️ Writing memory:
state.memory.store(address,data)where:addressis an integer representing the address from which angr will readdatacan be of typebytes,BVV(concrete data), orBVS(symbolic data)
It is as simple as that! Well, almost!
First, regarding memory reads and writes, you should know that they are done by default in big endian. This can be annoying because the endianness we most often encounter is little endian. However, it is possible to specify the endness=archinfo.Endness.LE parameter so that the read or write operation is performed in little endian.
For example, reading 8 bytes on the stack:
1
data = s.memory.load(s.regs.rsp,8, endness=archinfo.Endness.LE)
This is rather heavy in the sense that you have to specify it every time you want to read or write memory. I have not found any alternatives at the moment. If you find one, let me know ;) !
The version for writing data to memory in little endian:
1
state.memory.store(s.regs.rsp,b'data',endness=archinfo.Endness.LE)
Unlike the size specified in claripy BVV and BVS, the “size” parameter for reading memory is in bytes!
Indeed, BVV and BVS use a size in bits. So you need to be extra careful, because confusion between bits / bytes is common!
But why would we need to read/write memory when we have not needed to do it so far?
In programs more complicated than simple trivial crackmes, you generally need to get your hands dirty so that angr can run correctly.
A basic example is simply handling 32-bit x86 programs whose calling convention is based on using the stack. This way, if you want to handle arguments during a function call, you need to know how to write data to memory, more precisely to the stack.
Also, since the data we write to memory does not necessarily have to be concrete, it is possible to use symbolic variables in memory. Handy when the input is stored and/or retrieved in memory.
Exercise
Now that you know how to read and write memory, I recommend writing a small read_from_stack(state,n) function that displays the first n values (64-bit values, for example) on the stack of the state state.
This will be useful when you want to debug a program with angr.
Handling input ⤵️ and output ⤴️
Sometimes, it can be simpler to use standard input (input) and output (output) directly instead of hooking certain functions and making the solving script more complex.
For example, in the exercise from the previous chapter, we know that if the output is Win !, then the input is valid.
Reading the output ⤴️
Reading the output from a state is done like this:
1
output = state.posix.dumps(sys.stdout.fileno())
Obviously, do not forget to import the sys module so that this works correctly. The data returned by this function is bytes. For example, in the previous exercise, if the input is correct, the value contained in the output variable would be b"Win !\n".
But how can we have data displayed in the standard output when, in the previous exercise, we hooked functions like
puts,printf…
By using the output directly, you will no longer need to hook functions that display data in standard output, such as puts and printf.
In fact, for this kind of basic function, angr manages to hook them cleanly by itself without modifying their “overall” behavior. So, since these basic functions are supposed to display data in standard output, angr does write this data to the standard output, which we can retrieve with state.posix.dumps(...). That is why we do not see it directly in the terminal.
What is pretty nice once you know how to handle standard output is that you can use it to establish a “success” condition during path searching.
For example, by using an is_output_good function, it is possible to specify a condition directly on the output to know whether we have found the desired destination or not. In the same way, it is possible to use the output to specify a condition we want to avoid (avoid):
1
2
3
4
5
6
7
8
9
10
11
12
def is_output_good(state):
	# Is "Win !" present in the output?
	output = state.posix.dumps(sys.stdout.fileno())
	return b'Win !' in output

def is_output_bad(state):
	# Is "Lose !" present in the output?
	output = state.posix.dumps(sys.stdout.fileno())
	return b'Lose !' in output

# (...)
sm.explore( find = is_output_good, avoid = is_output_bad)
Using the output is not always the best solution. In fact, it all depends on the context. There is not always a single correct method to reach the destination. However, it can be useful in an obfuscated program where you do not really know which address you need to go to, but where you see an interesting string among the program’s strings.
In such a case, it can be interesting to use the output because you know what the program should display. But generally, it is better to know exactly where you need to go and how you need to do it. The string method is generally effective in simple and basic programs, but requires more thought otherwise.
Using the input ⤵️
Enough talk about output, let’s move on to the input!
Generally, here are the different ways a command-line program can retrieve input, for example a password to check, entered by the user:
- By directly asking the user to enter the password via
stdin(this is generally done withread,scanf, etc.) - By reading from a file (whose name is generally hardcoded)
- In the arguments of the program launched with
argv
Using stdin
In the same way we were able to handle the argv case with a hook, it is possible to do it with input by hooking the function that reads the input: read,scanf,gets, etc. That is probably what you did during the previous exercise, right?
Nevertheless, this implies:
- knowing which function reads the input and where in the code
- having to program hook functions
This can be done in a reasonable amount of time, but there is something much faster! Especially if the program is x86 (so 32-bit), you need to know at which address to write the symbolic buffer … this gets complicated!
All you need to do is use the stdin argument when creating the angr project.
For example, to create an input containing 12 symbolic bytes, you can do:
1
2
password = claripy.BVS('password', 12*8)
first_state = p.factory.blank_state(addr= 0xdeadbeef,stdin=password)
That’s it!
You should know that if the program is supposed to read only 12 bytes, the previous piece of code will work very well. On the other hand, if the program is supposed to read 12 bytes, then n others, you need to do it differently because this code constrains the input to exactly 12 bytes.
When you only want to provide the first bytes of the input and handle the n other bytes later, you need to use a SimFileStream.
The name may look a bit complicated, but it is relatively simple to use:
1
2
3
password = claripy.BVS('password', 12*8)

first_state = p.factory.blank_state(addr= 0xdeadbeef, stdin=angr.SimFileStream(name='stdin', content=password, has_end=False))
Often, the requested password consists only of ASCII characters. So it would be nice to be able to constrain our input to contain only ASCII characters in order to reduce the execution time of the script with angr.
This can be done, for example, like this:
1
2
3
4
5
6
7
8
9
10
11
12
13
import angr
import claripy

p = angr.Project("...")
state = p.factory.entry_state()

flag = [claripy.BVS('flag_%d' % i, 8) for i in range(12)]

# Add constraints to the solver
# so that the flag must be ASCII
for elt in flag:
    state.solver.add(elt >= ord(' '))
    state.solver.add(elt <= ord('~'))
Here, we declared flag as an array of BVS because a single multi-byte BVS is not directly iterable. But there is a method to still use one single BVS to make things easier and avoid having to go through a weird array:
1
2
3
4
5
6
flag = claripy.BVS('flag', 8*12)

# 1 byte = 8 bits, hence the parameter
for elt in flag.chop(8):
    state.solver.add(elt >= ord(' '))
    state.solver.add(elt <= ord('~'))
Exercise
You can test stdin handling by compiling a basic C program that reads, for example, 8 bytes and checks whether it is the correct password.
Then use angr to find the password automatically without having to hook the functions that read from stdin.
If you are out of ideas, you can reuse the C code from the exercise in the previous chapter, since the input there was read with
read. But this time, you will have to solve it without hookingread!
Using argv
We have already encountered argv before and, if you remember correctly, we used a hook on the atoi function to directly return a symbolic buffer.
But there is a simpler method to use a symbolic buffer in argv.
For example, if argv must contain two 12-byte passwords, we can declare two symbolic passwords in argv like this:
1
2
3
4
password_1 = claripy.BVS('password_1', 12*8)
password_2 = claripy.BVS('password_2', 12*8)

state = proj.factory.entry_state(args=['./program_name', password_1,password_2])
This is equivalent to launching the program like this: ./program password_1 password_2.
In the end, it is more or less the same method as for specifying the input: we directly use the available arguments when creating the initial state.
Here, the size is 12 bytes for each password. Obviously, you are free to choose a size suited to the program being analyzed. Also, we used symbolic buffers for stdin and argv, but it is entirely possible to use a “concrete” buffer. For example: b'my_password'.
In this piece of code, the
argvarray is represented by theargsarray. So do not forget that the first argument of a program is … the “name” (or path to) the program!
But why do we use
entry_stateinstead ofblank_statehere? What is the difference between the two?
In fact, a blank_state is a fairly basic state that contains a limited number of arguments. The entry_state is an initial state that is a bit more “complete” and can be initialized with more parameters, including args (which represents argv). That is why we use it here.
If you want to know more about the different types of states, here is some reading.
Using files with SimFile
We have seen how to handle the two main methods for retrieving input from the user, namely: stdin and argv. Another possibility is, as mentioned earlier, through file reading.
This is not necessarily the most common method in challenges / crackmes, etc., but it can be pretty good for vulnerability research in order to trigger a bug or symbolically fuzz functions that process data coming from a file read.
To simulate a file, it is possible to use SimFiles. Using SimFiles is generally done this way:
- Create the file data
- Create the
SimFile - Assign the
SimFileto the (initial) state’s filesystem
As for creating the data, you can probably guess that we can choose to put concrete data, symbolic data … or both!
Here is an example where the content contains both symbolic and concrete data:
1
2
3
4
symbolic_data = claripy.BVS('symbolic_data', 4 * 8)
concrete_data = b"concrete_data"

simfile = angr.storage.SimFile("my_file.bin", content=symbolic_data.concat(concrete_data))
And there we go! We have just made our first SimFile. But it is not over yet. Indeed, a SimFile must be linked to a state in order to be used. Otherwise, you may get NoneType exceptions when trying to read from or write to it.
To attach a SimFile to a state, we can do it in two ways:
- Directly when initializing the
state:1
state = proj.factory.entry_state(fs={ "my_file.bin" : simfile})
- By adding the file “by hand” into the filesystem of an existing state:
1
state.fs.insert("my_file.bin", simfile)
Thus, when the program opens and reads the my_file.bin file, angr will take care of using the SimFile we just created.
This way, there is no need to hook functions such as fopen, fread, etc. if the SimFile filename matches the filename opened by the program.
Handy!
Other types of files and streams
There are other ways to handle files or streams with:
SimPackets, which lets you handle data streams (e.g. network streams …) sent as asynchronous data chunks. ASimPacketcannot be used for both reading and writing at the same time.SimFileStream: This is a type close toSimFile, but it is used like a stream. So it will not have the same cursor position management features (which do not really make sense in a stream)
These are fairly advanced objects that we will not cover here. If you want to learn more, I invite you to read the doc!
Exercise
The following program reads data from a file in order to validate it or not. It is up to you to find the appropriate content using angr!
This exercise will help you understand the overall functioning of SimFiles.
1
2
3
4
5
6
7
8
9
10
11
12
13
14
15
16
17
18
19
20
21
22
23
24
25
26
27
28
29
30
31
32
#include <stdio.h>
#include <stdint.h>

int main() {
    FILE *file = fopen("password.bin", "rb");
    if (file == NULL) {
         perror("Error while opening the file");
         return 1;
    }

    uint64_t win_value = 0xdeadbeefcafebabe;
    uint64_t read_value;

    // Read 8 bytes from the file
    size_t bytes_read = fread(&read_value, 8, 1, file);
    if (bytes_read != 1) {
         perror("Error while reading the file");
         fclose(file);
         return 1;
    }

    // Close the file
    fclose(file);

    if (read_value == win_value) {
         printf("Win\n");
    } else {
         printf("Lose\n");
    }

    return 0;
}
To compile it: gcc -no-pie main.c -o exe.
Hint: no hook is necessary to complete this exercise 😉 !